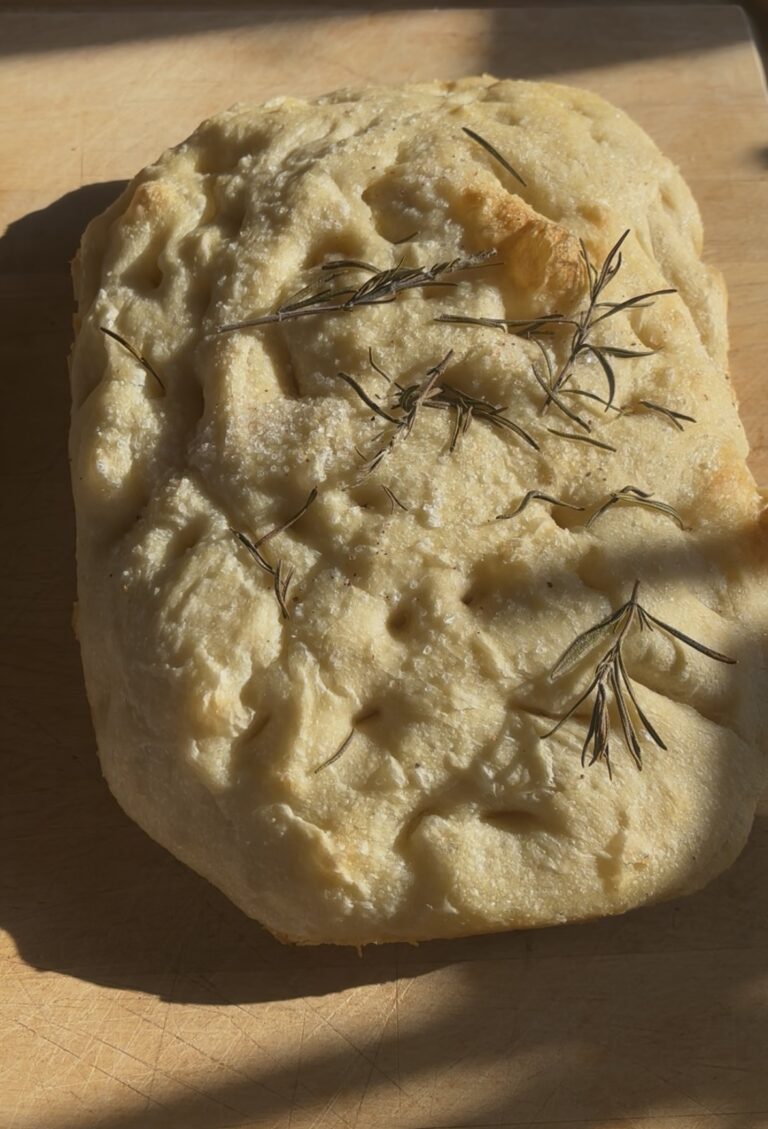
Chocolate Sourdough Cinnamon Rolls
Forget plain cinnamon rolls—we’re adding a secret ingredient that makes them ten times better: Chocolate sourdough starter. This isn’t about making them taste sour; it’s about using the starter’s magic to make the rolls incredibly soft and to boost the deep, chocolate flavor, turning a simple sweet roll into the most delicious treat you’ve ever pulled apart for breakfast.
Amazing Chocolate Sourdough Cinnamon rolls
Hey there, fellow food lovers!
Have you ever looked at a fluffy, gooey sourdough cinnamon roll and thought, “Wow, I wish I could make that”? Well guess what? You totally can! And it’s not nearly as hard as it sounds.
Today, we’re going to talk about making these incredible treats using your sourdough starter. Don’t be scared by the “sourdough” part – it just means more flavor and a really soft texture. Think of your starter as your little baking helper!
Don’t have a sourdough starter? Here is my guide on how to start a sourdough starter from scratch.
Beyond the Basic Roll: Why You Need Chocolate Sourdough Cinnamon Rolls
We all love a classic cinnamon roll: warm, sticky, and topped with thick icing. But if you’re ready for an upgrade, let’s talk about the secret to the best breakfast treat you’ve ever had: chocolate sourdough cinnamon rolls.
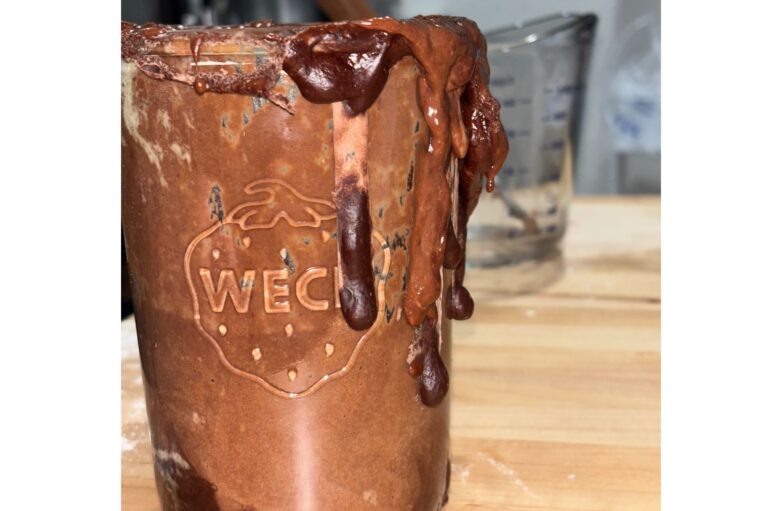
It might sound fancy, but the idea is simple. You take the soft, rich dough of a cinnamon roll and use a sourdough starter instead of regular yeast. Then, you mix cocoa powder into the dough and the filling for a double dose of deep chocolate flavor.
The Sourdough Magic
You might be thinking, “Will it taste sour?” The answer is no! The slight tang from the sourdough is the magical touch. It doesn’t make the roll taste like bread; it actually acts like a flavor booster for the cacao powder in the starter. That subtle sour note cuts through the sweetness and makes the cocoa flavor taste richer, deeper, and more complex than any store-bought roll.
Why They are Worth the Wait
Sourdough rolls take a little longer to make because the natural starter needs time to work, often resting overnight. But this slow process is a good thing!
- They are extra soft: The long rest gives the dough a melt-in-your-mouth tender texture.
- They stay fresh longer: Sourdough baked goods are famous for staying soft and fresh for an extra day or two.
- The ultimate flavor: You get the warmth of cinnamon, the intense richness of chocolate, and a slight background complexity that keeps you coming back for another bite.
Next time you bake, skip the normal yeast and try this chocolate sourdough combination. It’s a simple switch that turns a good sweet roll into a truly unforgettable experience.
Enhancing Chocolate Sourdough Cinnamon Roll flavors
Adding cocoa or cacao powder to your cinnamon rolls and icing enhances the flavor in a few key ways:
- It Cuts the Sweetness: Plain icing (made from just powdered sugar and milk/cream) can be very sweet. Unsweetened cocoa powder has a natural, mild bitterness. When you mix it in, this bitterness acts as a counterpoint that balances the sugar, making the entire icing taste less better.
- It Adds Rich, Deep Flavor: Cocoa powder gives the icing a complex, almost earthy chocolate base. Just like the chocolate sourdough. This deep chocolate taste pairs perfectly with the spicy warmth of the cinnamon in the rolls, creating a classic and highly satisfying flavor combination (think chocolate and spice).
- It Creates Depth: The chocolate flavor is deeper than just simple vanilla. This richness makes the roll feel more indulgent and makes every bite a multilayered experience—you get the tangy sourdough dough, the spicy cinnamon filling, and the rich chocolate glaze all at once.
In short, the cocoa powder gives the icing the richness and depth it needs to match the intense flavor of the chocolate sourdough roll, making the whole treat taste better.
Baking Magic: How to Make Cinnamon Rolls (Step-by-Step)
Cinnamon rolls are soft, sweet, and totally worth the effort! Here is a simple, easy-to-follow guide on how to make them.
Part 1: Making the Dough and Letting it Rise
This is where the sourdough wild yeast does its magic to make the rolls soft and fluffy.
- Step 1: Mix the Wet and Dry. In a large mixing bowl, mix all ingredients together.
- Step 2: Knead the Dough. Use your hands or a mixer to knead the dough until it is smooth and stretchy. It should not be too sticky.
- Step 3: Let it Rise (The First Time). Place the dough ball in a lightly oiled bowl, cover it with a towel or plastic wrap, and put it in a warm spot. Let it sit for 1 to 2 hours, or until the dough has doubled in size. I had mine rest on the counter top overnight since it was colder in the kitchen. If it it warm, place it in the fridge to bulk ferment.
Part 2: Filling, Rolling, and Cutting
This is where you turn the dough into the classic swirl shape.
- Step 5: Roll it Out. Gently punch down the dough to let the air out. Roll it out onto a lightly floured surface into a large, flat rectangle shape.
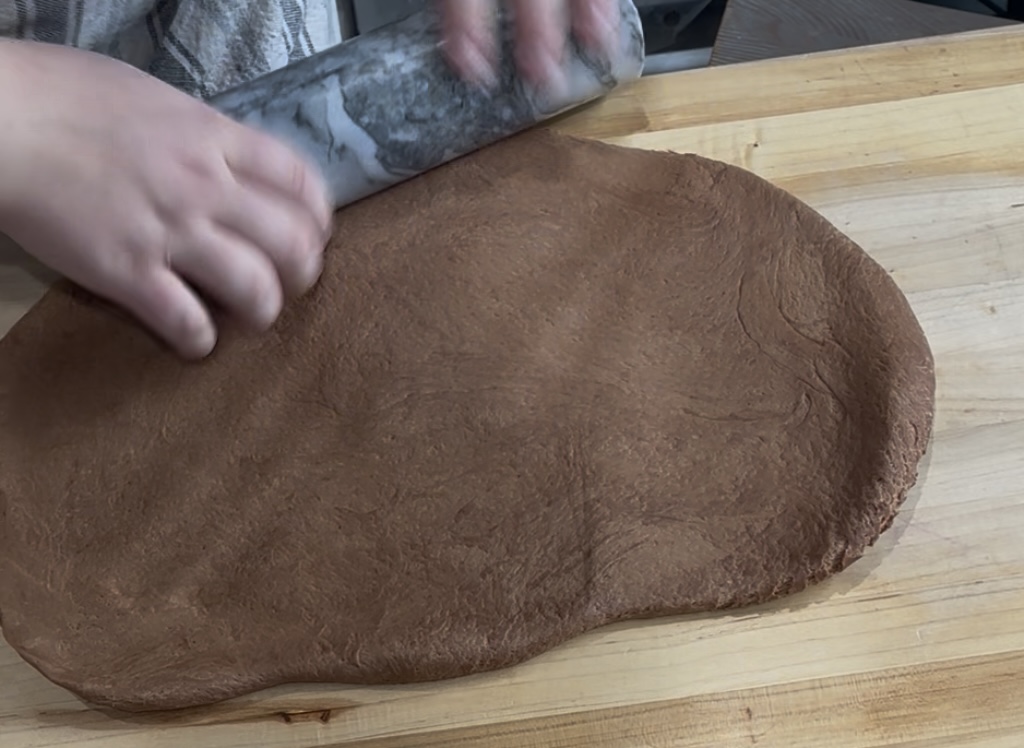
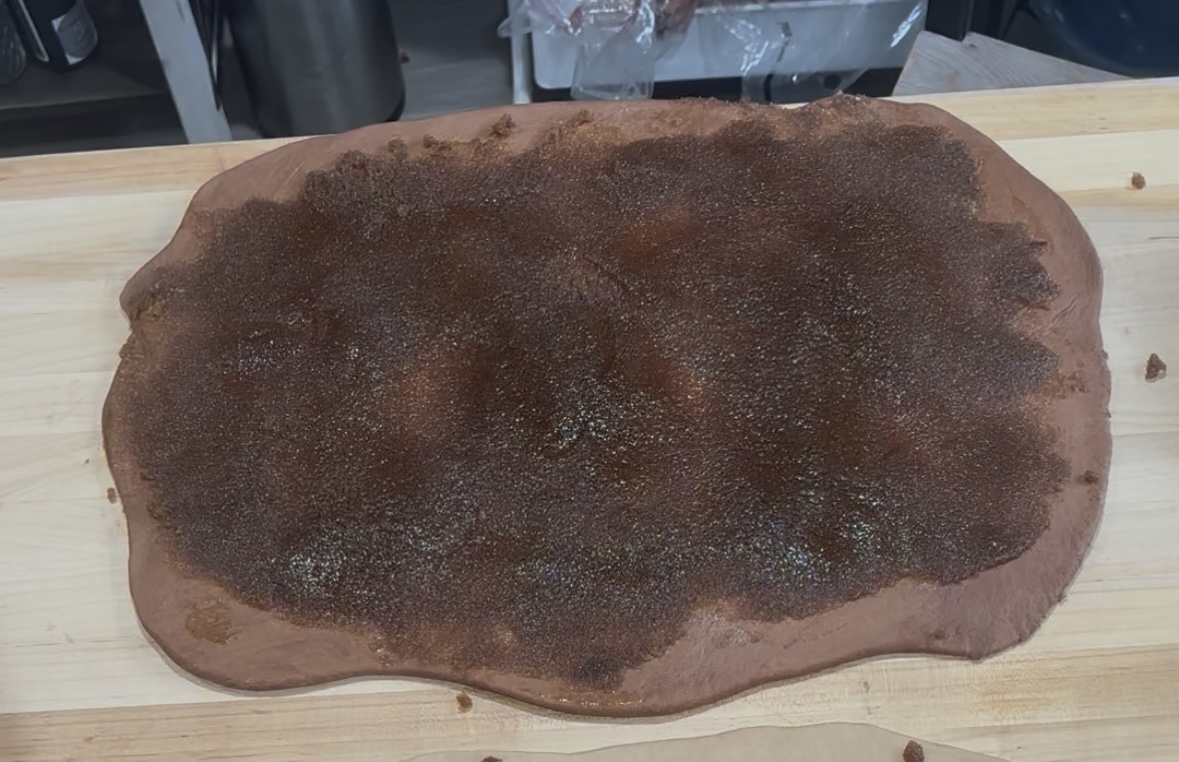
- Step 6: Spread the Filling. Spread soft melted butter with the cinnamon, brown sugar, and ginger all over the dough rectangle, leaving a small, clean edge on one side.
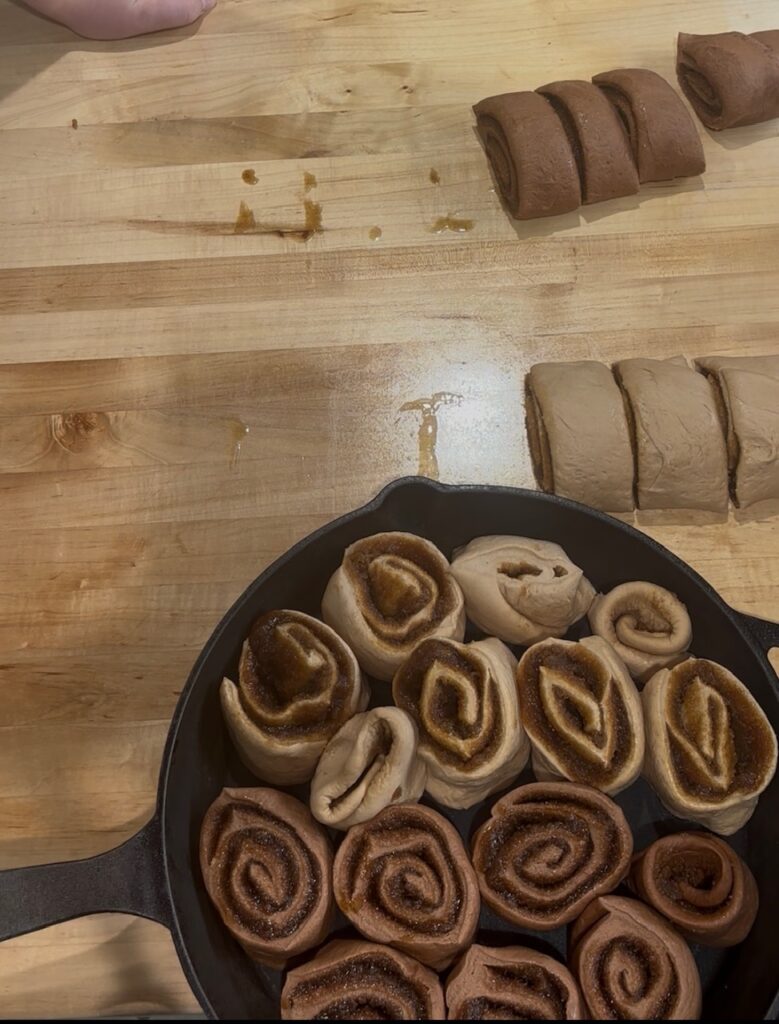
- Step 8: Roll it Tight. Starting from the long edge, carefully roll the dough up tightly into a long log shape.

- Step 9: Cut the Rolls. Use a sharp knife, bench scraper, or a piece of unflavored dental floss to cut the log into equal pieces, about 1 to 1.5 inches thick.
Part 3: The Final Steps
Almost done! Time for the final rise and the oven.
- Step 10: The Second Rise. Place the cut rolls into a greased baking pan, making sure they are slightly touching. Cover the pan and let them rise again in a warm spot for about 30 minutes to 1 hour. They should look puffy.
- Step 11: Bake! Put the pan in a preheated oven (350F) and bake for until they are golden brown on top.
- Step 12: Frost and Enjoy! While the rolls are cooling (but still warm), mix up your frosting. Spread it generously over the rolls and serve!

Enjoy your warm, homemade cinnamon rolls!
Chocolate Sourdough Cinnamon Rolls
Equipment
- 1 Electric Mixer
- 1 cast iron pan
- 1 bench scraper
Ingredients
- 3 cups all purpose flour
- 1 cup buttermilk
- ½ cup active chocolate sourdough starter
- 2 TBSP sugar
- 2 TBSP cacao powder
- 3-4 TBSP milk only add if you dough is too dry after adding the cacao
- 8 TBSP melted butter
- 1 tsp salt
Optional-only if using sourdough discard
- 1 tsp baking powder
- ½ tsp baking soda
Cinnamon Sugar Filling
- 1 cup brown sugar
- 1 TBSP cinnamon
- ¼ tsp ginger
- 8 TBSP melted butter
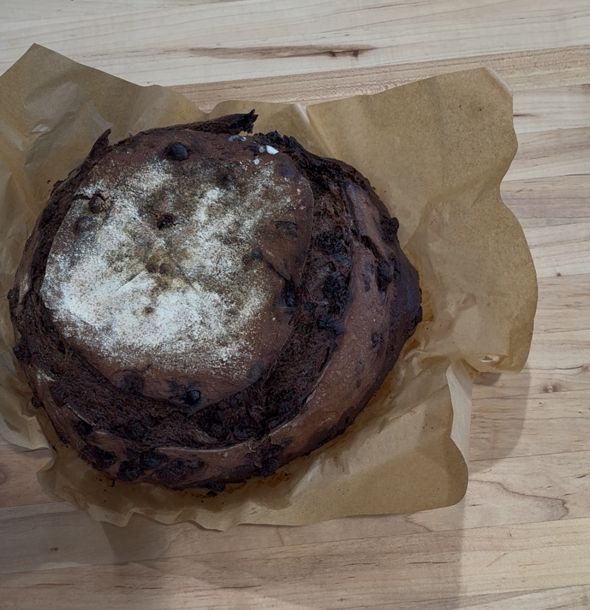
Cream Cheese Glaze
- 180 grams cream cheese
- ½ cup powdered sugar
- 1 tsp vanilla
- 2 tsp heavy whipping cream
- 2 tsp cacao powder
Instructions
- Combine all ingredients together in an electric mixer, add flour last.
- Slowly add flour until the dough doesn't stick to the sides of the mixer. If 3 cups isn't enough, add 1 TBSP of flour until dough doesn't stick.
- Once done, let bulk ferment over night. You can do it in the fridge or on the counter top depending on how cold your kitchen is.
- The next morning (add your baking soda and baking powder if using discard), roll your dough out to about a ¼inch thick.
- Add your cinnamon-sugar mixture and spread on top.
- Roll your dough into a log shape then cut out the cinnamon rolls into 1½ inch pieces. Add those to a cast-iron pan.
- Let rise for 30-45minutes
- Preheat your oven to 350℉
- Optional: Add 1/2 cup of heavy cream to your pan with the uncooked cinnamon rolls in it.
- Place in the oven and bake for 25-30minutes, or until the tops are golden brown.
- Once out, add the cream cheese glaze on top and enjoy!
The Secret to Freshness: Storing Your Sourdough Cinnamon Rolls
You’ve put in the time and love to make a batch of incredible sourdough cinnamon rolls. They smell fantastic, but what if you can’t eat them all right away? Or what if you want a fresh-baked treat without the morning hassle?
Whether you need to save the dough for later or store the finished, baked rolls, getting the storage right is key to enjoying that soft texture and tangy flavor.
Here is your simple guide to storing sourdough cinnamon rolls, both before and after baking.
Part 1: Storing the Unbaked Dough (The Make-Ahead Trick)
This is the perfect way to get those “fresh-baked” rolls on a busy morning! The sourdough method works beautifully for cold storage.
1. After the First Rise and Shaping
If you’ve mixed your dough, let it complete its first long rise, then rolled it out, filled it, and cut the rolls:
- The Container: Place the cut rolls into your greased baking pan.
- The Cover: Cover the pan tightly with plastic wrap or a lid. Make sure it’s airtight!
- The Fridge: Put the pan in the refrigerator. The cold temperature will slow down the sourdough starter, putting the second rise on pause.
- How Long: You can store the unbaked rolls this way for up to 24–48 hours.
2. Baking from Cold
When you’re ready to bake:
- Take Them Out: Pull the pan out of the fridge.
- The Second Rise (Warm-up): Let the rolls sit on the counter in a warm spot for 1 to 2 hours. You can lay them on top of your oven while pre-heatingThey need this time to warm up and finish their second rise. They should look puffy and soft.
- Bake: Bake as directed in your recipe!
Part 2: Storing the Cooked Rolls
Got leftover baked rolls? Here’s how to keep them soft and ready for the next day.
1. On the Counter (Short-Term)
If you plan to eat them within 2 days:
- Hold the Frosting: If possible, store the rolls unfrosted. Frosting adds moisture, which can make the rolls spoil faster at room temperature.
- Cover Tightly: Place the cooled, unfrosted rolls in an airtight container or a sealed zip-top bag.
- Storage: Keep them at room temperature away from heat or direct sun.
2. In the Freezer (Long-Term)
This is the best way to save baked rolls for later (up to 2–3 months):
- Cool Completely: Make sure the rolls are 100% cooled before wrapping.
- Freeze Unfrosted: Again, do not frost the rolls before freezing.
- Wrap Tightly: Wrap each individual roll tightly in plastic wrap first, then place all the wrapped rolls into a large, freezer-safe bag. Squeeze out excess air.
3. Reheating the Baked Rolls
To bring your stored rolls back to life:
- From the Counter/Fridge: Heat them up in the microwave for 10–15 seconds or wrap them in foil and bake in a 300F oven for about 10 minutes.
- From the Freezer: Thaw the wrapped rolls on the counter for a few hours. Once thawed, reheat as directed above.
- Frost: Slather on the frosting after they are reheated!
Enjoy your perfectly soft, warm, and flavorful sourdough cinnamon rolls anytime!